Front-end script
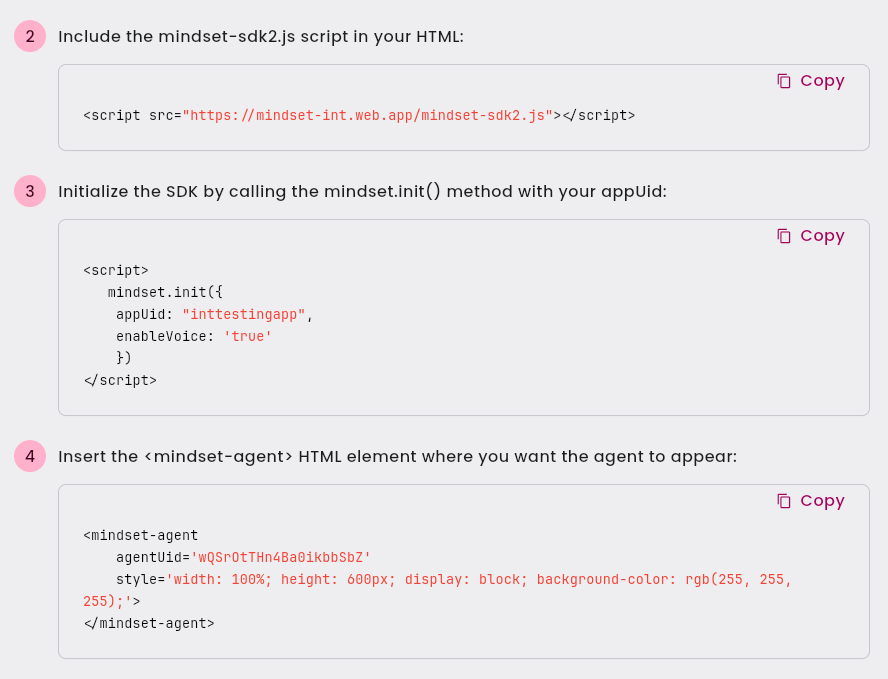
There are 3 steps to follow in your Front-end code in order to embed a Mindset agent: 1. Add themindset-sdk2.js script
<mindset-agent> HTML tag
mindset.init() method with your configuration
- In the case that your agent uses the anonymous access, you have to whitelist URLs in your Agent Management Studio. (For example you can whitelist
http://localhostwhile your are testing your code locally) - In case your agent uses the authenticated access, you have to set the
fetchAuthenticationparam in theMindset.init()method. (See above The fetchAuthentication method for more details)
Parameters required for your configuration
In order to get your configuration parameters, you either contact the Mindset AI team or you can directly go on your Agents Management Studio dashboard listing your live agents. For each of those agents you will be able to display the full deployment instructions with your specific configuration parameters already displayed:- Sample live agent deployment instructions:
Sample live agent deployment instructions
- You can also ask directly Mindset for the required parameters:
The fetchAuthentication method
In case your agent uses the authenticated access, you have to set thefetchAuthentication param in the Mindset.init() method and provide a method which will be in charge of fetching the authToken from your Back-end authentication script
Let’s say your front-end method is named getAuthToken, you then have to set the fetchAuthentication param as follows:
Sample fetchAuthentication method
Sample fetchAuthentication method
Front-end page full example
With anonymous access
Sample HTML page embedding an agent:
Sample HTML page embedding an agent:
With authenticated access
Sample HTML page embedding an agent including the fetchAuthentication method
Sample HTML page embedding an agent including the fetchAuthentication method
Customizing the agent UI colors
There is a default Theme color palette for the agent UI, but you can customize it by passing atheme parameter to the mindset.init() method.
Please read the Agent UI color theme documentation for more details about the available options.
Customizing the agent Font
There is a default Font for the agent UI, but you can customize it by passing acustomFontTheme parameter to the mindset.init() method.
Please read the Agent Fonts customization documentation for more details about the available options.
Flexible agent UI
The<mindset-agent> tag can be wrapped in any <Div> element of your page.
But if you prefer to have a more flexible UI for your agent and you need to let the agent Ui always visible anywhere but without being intrusive, there is the option to enable the Flexible agent UI mode.
Please read the Flexible Agent UI documentation for more details.